HTB Cat
![]()
 …
…
It’s been a while since my last writeup, mostly due to ongoing learning, balancing work and family life, and, honestly, just not feeling like writing. (Excuses, I know, hahahaha.) However, I’m excited to get back into the groove with this walkthrough on a HTB machine that was released yesterday. I realized that my previous posts may not have been detailed enough for beginners to follow along, so this time, I’ll make sure to go through everything step-by-step. I’ll break down each part of the process—from the initial foothold to root—and explain everything clearly so that anyone—no matter their experience level—can follow along. (Or at least try too..). So let’s get started!
Threader3000
Let’s start off, as usual, with an initial port scan of the target IP. We’ll use Threader3000 for this—a multi-threaded Python port scanner built on Nmap. It will sweep all the ports in under a minute, which is much faster than a full port scan using Nmap
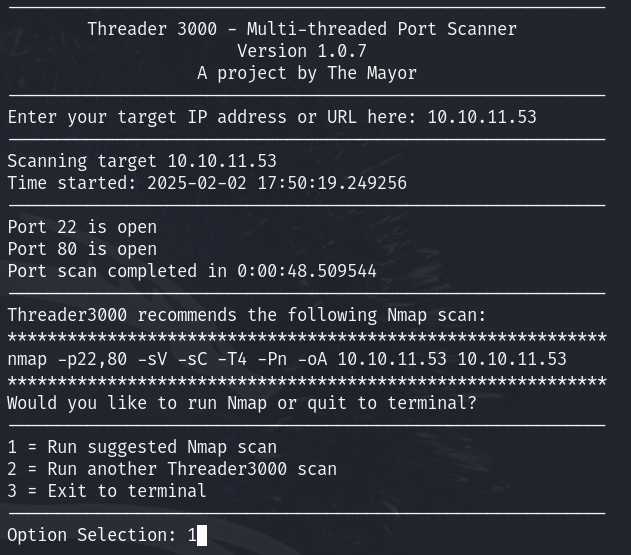
We can see that two ports are open: 22 and 80. Next, let’s break down the Nmap command that Threader3000 is suggesting:
nmap -p22,80 -sV -sC -T4 -Pn -oA 10.10.11.53 10.10.11.53
-p22,80specifies which ports we want to scan, seperated by a comma.-sVenables version detection, allowing us to learn more about the services running on the open ports.-sCtriggers the default script scan, running useful Nmap scripts to gather additional information.-T4increases the speed of the scan (with the range being 1-5, where the default is -T3).-Pntells Nmap to skip host discovery, assuming the target is alive.-oA 10.10.11.53saves the output in multiple formats into a directory named after the target IP.10.10.11.53is the IP we are scanning.
Nmap output
Now that we’ve broken down the command, let’s see what’s running on those ports…”
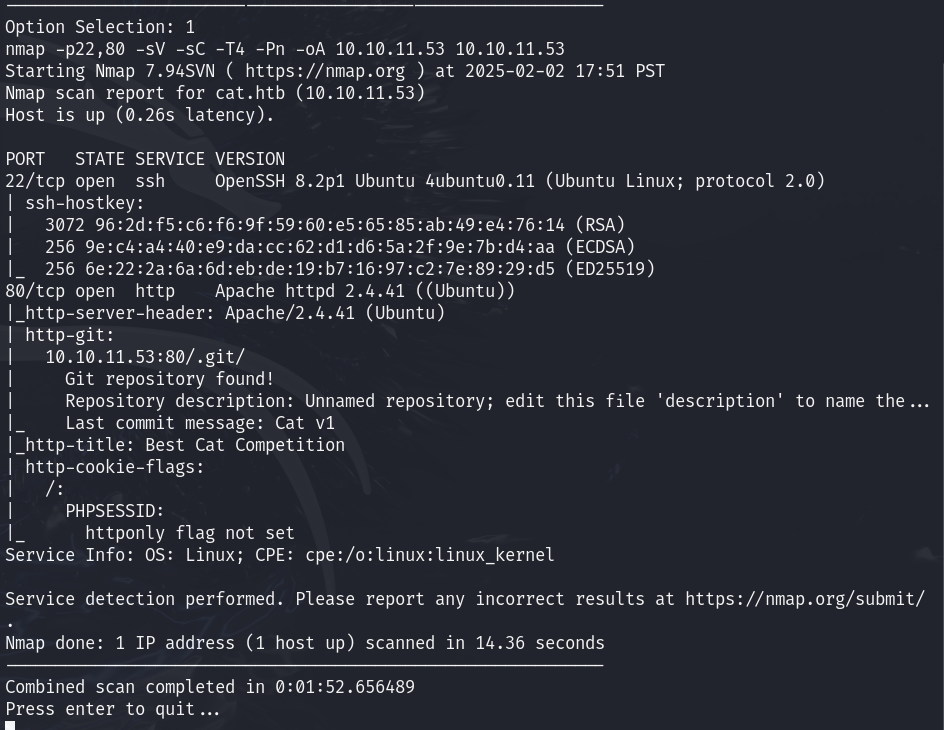
Both OpenSSH 8.2p1 (latest: 9.9p1) and Apache 2.4.41 (latest: 2.4.63) are outdated, which might open up the possibility of finding an exploit
A .git directory was found. We could potentially use gitdumper to dump the contents, rebuild the commit history, and gain access to the source code.
The PHPSESSID cookie does not have the HttpOnly flag set.
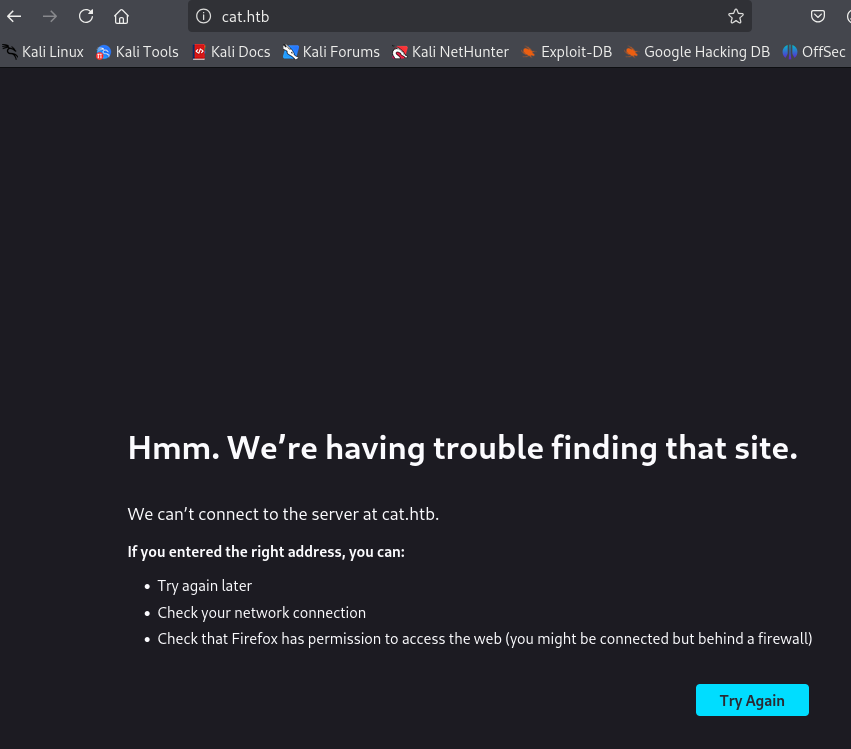
Error
let’s head over and see whats on 80.
Etc
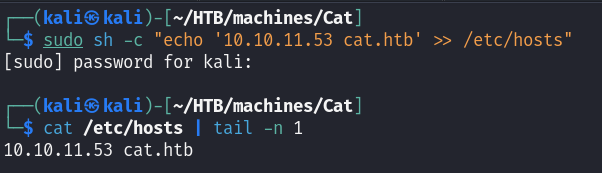
We need to elevate our privileges and create an entry in /etc/hosts containing this domain name, mapping it to this IP. We can do this by running:
sudo sh -c "echo '10.10.11.53 cat.htb' >> /etc/hosts"
After entering your password, run:
cat /etc/hosts | tail -n 1
to verify the entry was created.
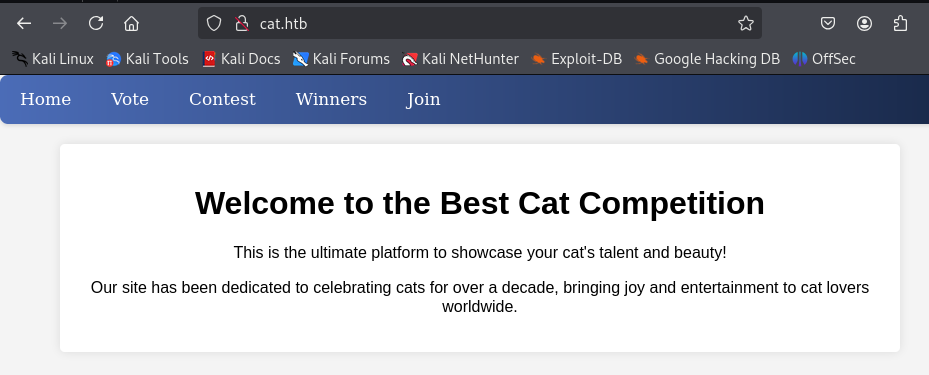
Live site
…Now, let’s refresh the page.
And there it is. The site is live.
But that’s where I’ll leave you for now. I can’t give away too much, it is an active seasonal machine! Make sure to tune back in for the full writeup where we’ll dive deeper into the exploitation. Trust me, you won’t want to miss the rest of this journey…